


HOW WE WORK
The process of 3D visualization of interiors consists of several stages:


Conclusion of an agreement and prepayment of 50% of the order amount

Receiving technical specifications (TS) from the designer

Discussion of which models will be used ready-made, and which ones need to be ordered from a modeler for additional money

First sketches

Changing geometry or confirming it

Finalizing sketches

Making possible edits

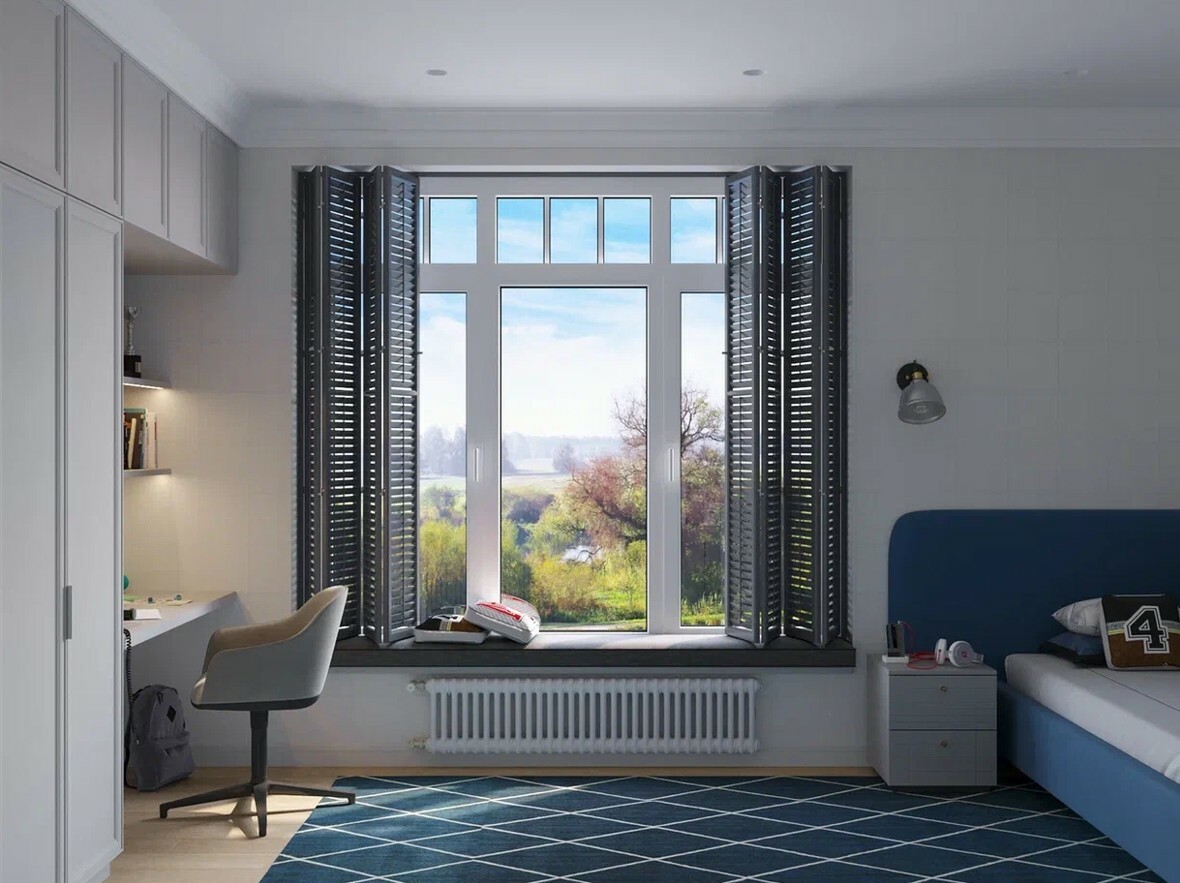
Renders with post-processing

Payment for the remaining part of the order


Making possible edits
Payment for the remaining
part of the order
part of the order
Receiving technical
specifications (TS)
from the designer
specifications (TS)
from the designer
Discussion of which models
will be used ready-made,
and which ones need to be ordered
from a modeler for additional money
will be used ready-made,
and which ones need to be ordered
from a modeler for additional money
First sketches
Changing geometry
or confirming it
or confirming it
Finalizing sketches
Introduction. Discussion of the project and methods of interaction between the customer and the studio
Conclusion of an agreement
and prepayment of 50%
of the order amount
and prepayment of 50%
of the order amount
Renders with post-processing
LET'S CONSIDER EACH STAGE IN DETAIL
At the first meeting we discuss the following:
Methods of effective interaction between the customer and the studio. We have several options, tested in practice.
We clarify which specific rooms we will visualize in the project.
We determine whether there are any unique items in the interior that will definitely need to be given for modeling.


We calculate the resulting square footage minus bathrooms and dressing rooms, since we evaluate them individually.

Conclusion of an agreement and prepayment of 50% of the order amount.

When all issues are resolved, an advance payment of 50% of the total project amount is made. If the project is large, it can be divided into several stages. And then an advance payment is made only for the first stage. As soon as the advance payment is received on the account, we immediately begin work.
Components of the technical specifications for 3D interior visualization:

Explication plan
of premises
of premises

Furniture
arrangement plan
arrangement plan

Electrical Equipment
Layout Plan
Layout Plan

Floor plan

Ceiling plan

Scanning along the walls of the premises (optional)
Collage with arrangement of specific models and textures according to their position in the project

List of links to models from the site www.3dsky.org that need to be downloaded for the project (this is desirable, as it will save us a lot of time)

Drawing in dwg format, or project file in pla format (this is the ArchiCAD archive format)
Options for interaction between the customer and the studio:

Website - miro.com
For us, the most preferable way is to organize the workflow through the website www.miro.com. This board speeds up the interaction between the studio employees and the customer and allows avoiding many problems related to data loss.

Skype / Telegram
Interaction via Skype or Telegram. Here we call each other and demonstrate our screen, showing the project. We have a detailed discussion and simultaneously record the screen. After the conversation is over, the recording is given to the performer. This method allows us to identify the details of the technical task and discuss possible problems when working on the project. Subsequently, edits are made in the same way. Below is a video with a similar recording of the conversation


Chat / Mail
Experience in this area has revealed many problems when working in a regular chat or via mailbox. Therefore, this type of interaction is absolutely not suitable. A chat can be created, but it is usually not worth discussing the project in detail there, since the information can subsequently be lost.

For more information on how to work on this resource, watch the video below. It will take you no more than 30 minutes to master the functionality of the site. At the same time, no additional software installation is required on your computer. All that is needed is just a simple registration.
P R E V E R I A N T
In our studio we can go two ways of providing sketches.

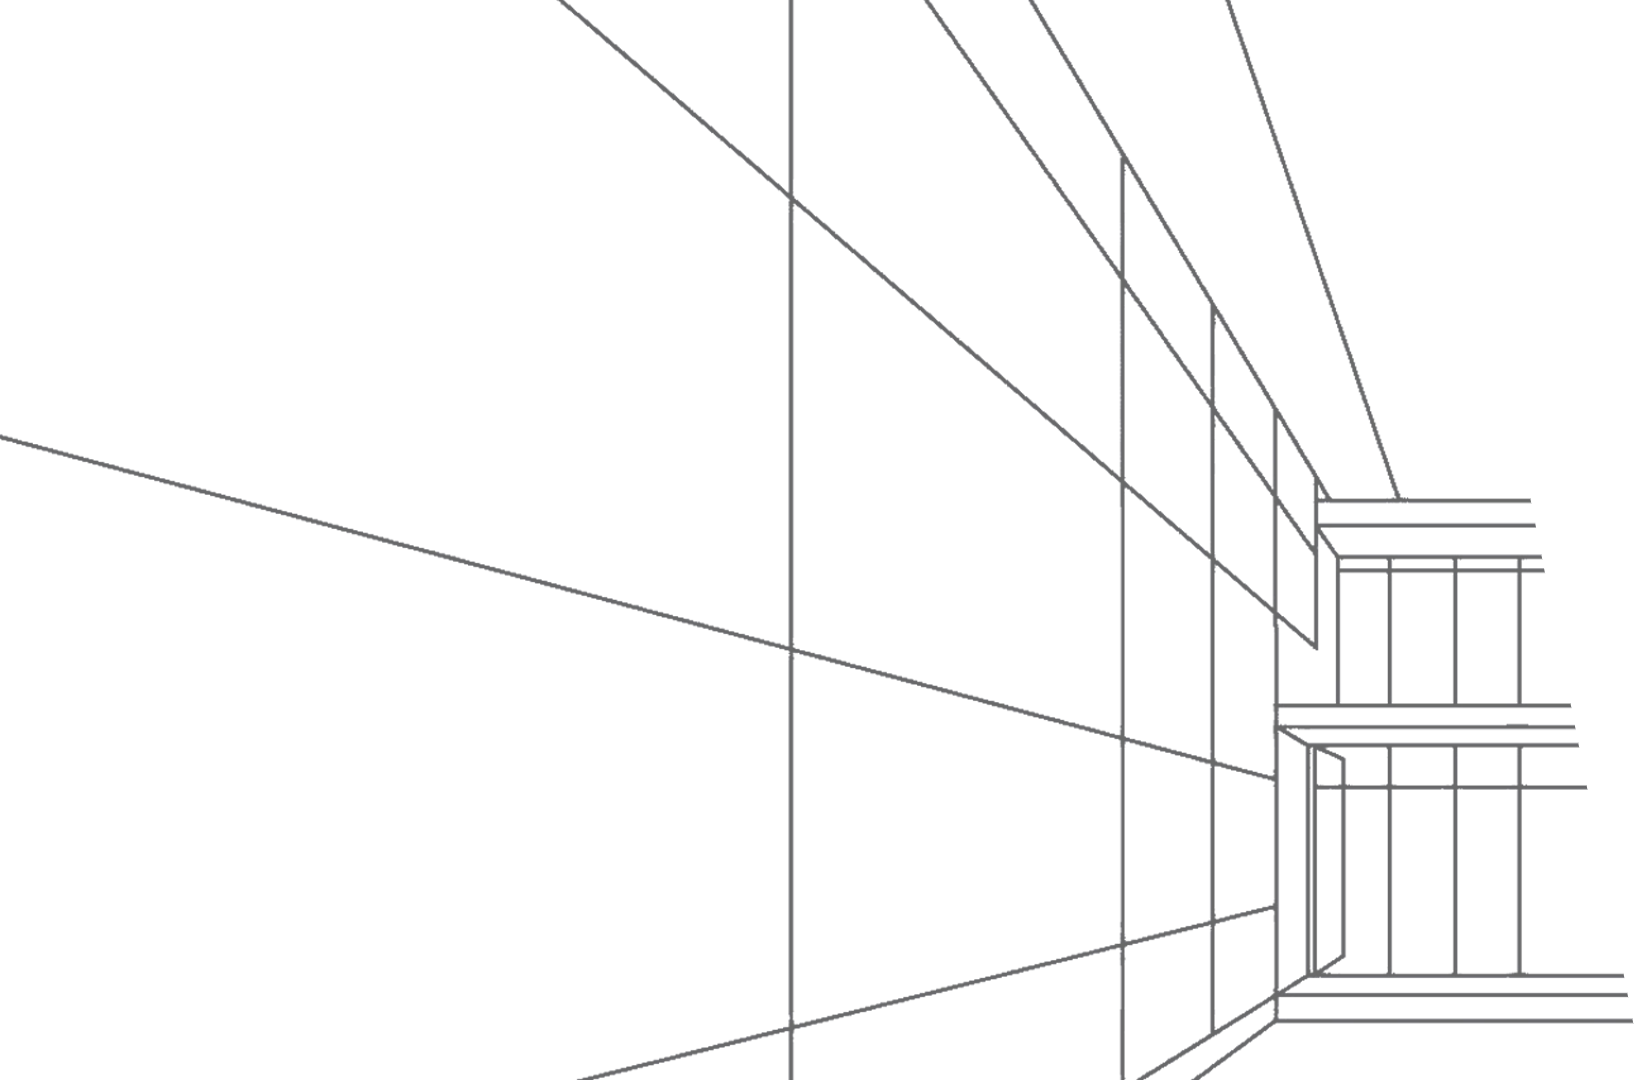
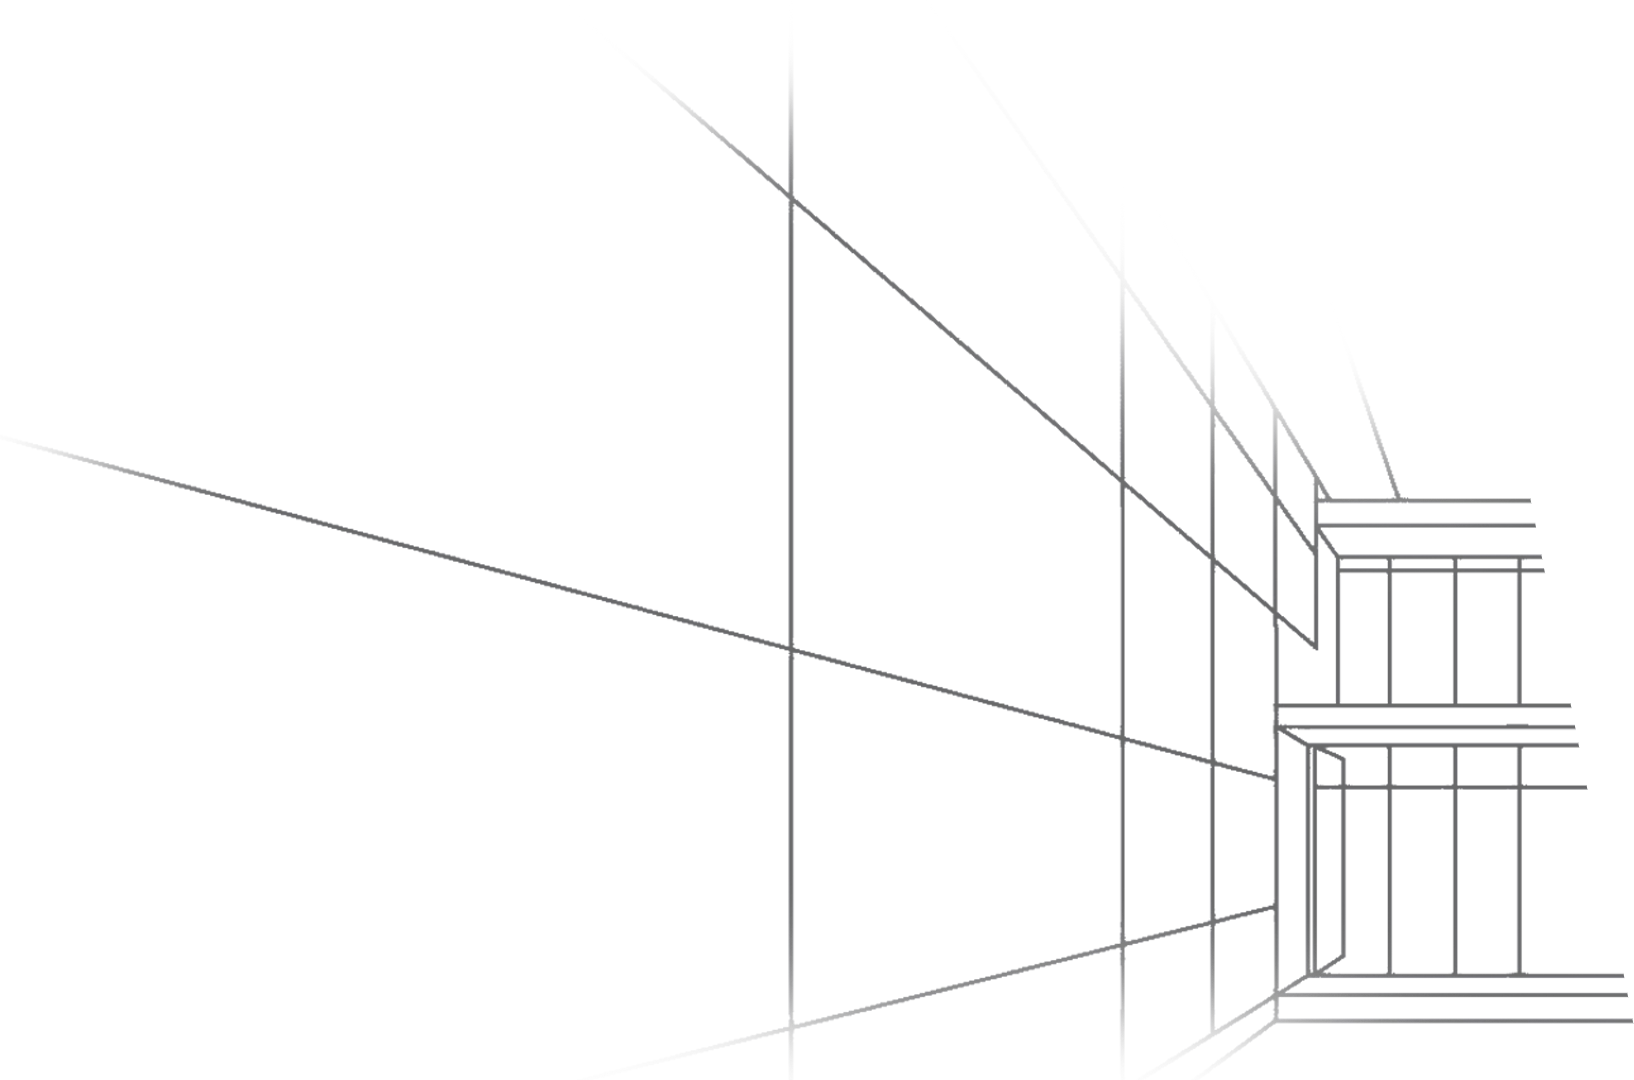
The first option is to make sketches in color with some noise. They are screenshots from the rendering window and look like this
They are done very quickly and do not require post-processing. They can also be shown to the customer.
The second option is to make black and white sketches with some elements in color (background outside the window, floors, glass partitions). In this case, you can get sketches faster after starting work on the project, since we will not have to waste time on texturing.
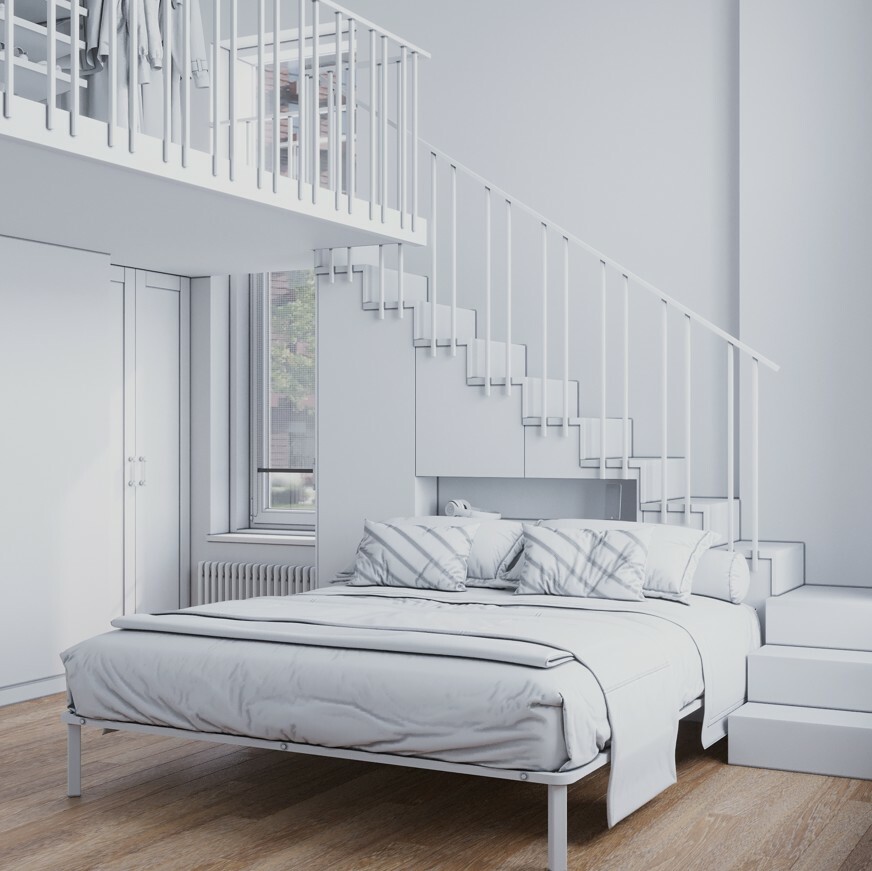
It may also be easier to approve the geometry using this sketch, since the customer will not be distracted by the color scheme. An example of such a sketch is above.
After the geometry of the project is approved, color sketches are also made as in the first version.

Refining sketches and making possible corrections
In both cases, we work with sketches until we get approval for the project. But the number of free iterations for making edits can only be three. Further, there will be a discussion of additional payment, since we all need to value each other's time.


I would like to draw attention to one point. Often designers ask to turn on all light sources in the project at once. We are categorically against this approach. Because in life you will never do this. It is very important to work out the scenario of turning on light sources for a particular render.
If we choose a mixed lighting scheme, and this is daylight from the windows, plus a small backlight from internal light sources, then we need to choose a scenario so that, firstly, the power of the internal sources does not interrupt the daylight and does not burn out the shadows with this internal light. If you really need to show full illumination by internal sources, then it is better to choose an evening or night version of interior lighting. All this can be discussed in the process of 3D visualization of the interior of your project.
Attention!


Our contacts:
Skype: mike.rusakov
Phone: +972-53-2787816
Phone (8-985-127-53-68 for messengers)
e-mail: rumacros@yandex.ru
Skype: mike.rusakov
Phone: +972-53-2787816
Phone (8-985-127-53-68 for messengers)
e-mail: rumacros@yandex.ru
2012-2024 © R3DR.RU
Copying and use of data
without permission of the copyright holder is prohibited
Copying and use of data
without permission of the copyright holder is prohibited
Заполните форму и мы с вами свяжемся для бесплатной консультации
Нажимая кнопку "Скачать" Вы соглашаетесь с политикой обработки персональных данных
Fill in the form and we will contact you for a free consultation
By clicking the "Send" button you agree with the personal data processing policy
Заполните форму и мы с вами свяжемся для бесплатной консультации
Нажимая кнопку "Скачать" Вы соглашаетесь с политикой обработки персональных данных
Заполните форму и мы с вами свяжемся для бесплатной консультации
Нажимая кнопку "Скачать" Вы соглашаетесь с политикой обработки персональных данных
